STRENGTH IN A TIME OF CORONA PART FOUR: SANDBAG TRAINING
By TAKU
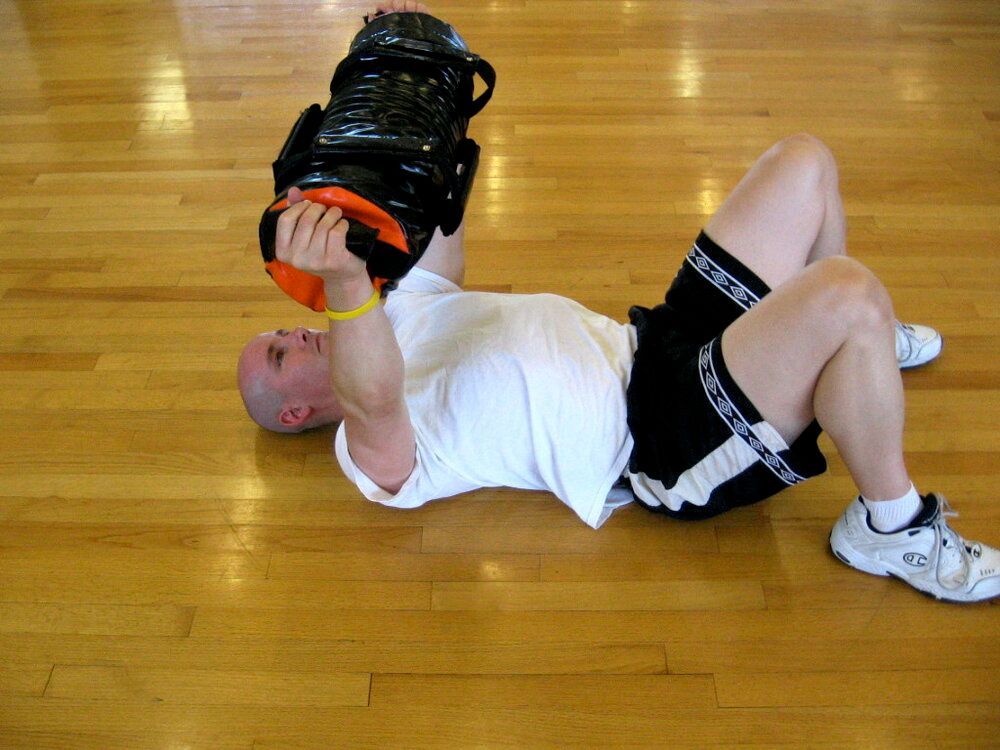
TAKU Doing a Sand-Bag floor press
One of the things you hear us say frequently on our podcast episodes is “Train Outside The Box”. In part four of our Strength in a Time of Corona series we’re going to explore that concept by focusing our attention on one of the less conventional tools in our training toolbox, sandbags.
We’ve said it many times but it bears repeating; muscle overload can be applied with a variety of tools: barbells, dumbbells, machines, manually applied resistance, body weight, sand bags, etc. Anything that can create high tension in the muscles can be used.
There is no question…sandbag training works! There is no arguing sandbag training can make you strong. However, sandbags, like any other training tool have the potential to be misused. Misuse of any strength training tool could lead to possible injuries. Due to the uneven loading and less stable nature of sandbags, sandbag training must be explored with safety in mind.
The first rule of thumb is that a good sandbag should have mobility. Too many people try to over-fill their sandbags, turning them into an inflexible sand-”log”. When buying ready made sandbags, I recommend slightly under filling them. If your bag says it is rated at a maximum weight of 75 lbs., I suggest you only fill it up to 65-70 lbs. You want it to be a little loose and flexible. If you like lifting a heavy log, you may think about building some of each (stiffer bags, and less stiff bags).
Finally, unlike most other training implements you aren’t going to progress by five pound increments. Manipulating many other training variables such as placement of load, speed of movement, rep ranges, and work to rest ratios will serve as better methods for adding variety and progression.
At the end of this article I will direct you to some great resources that will assist you with designing and implementing various progressions, and even where to buy some sandbags (if you choose not to build your own).
But first we must discuss the most fundamental ideas of sandbag training, starting with; how and where to hold the sandbag.
TAKU Preparing for Bear Hug lift
Bear Hug:
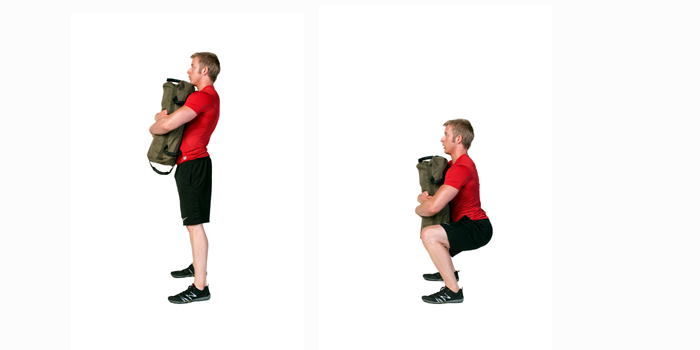
Squat using Bear Hug Grip
This position is the starting place for the introduction of sandbag training. Keeping the sandbag very close to the body and clasping the arms around the sandbag decreases the leverage working against the body. This makes this holding position the easiest to balance and lift the greatest loads. The dimensions of the sandbag will additionally impact the level of difficulty of this style.
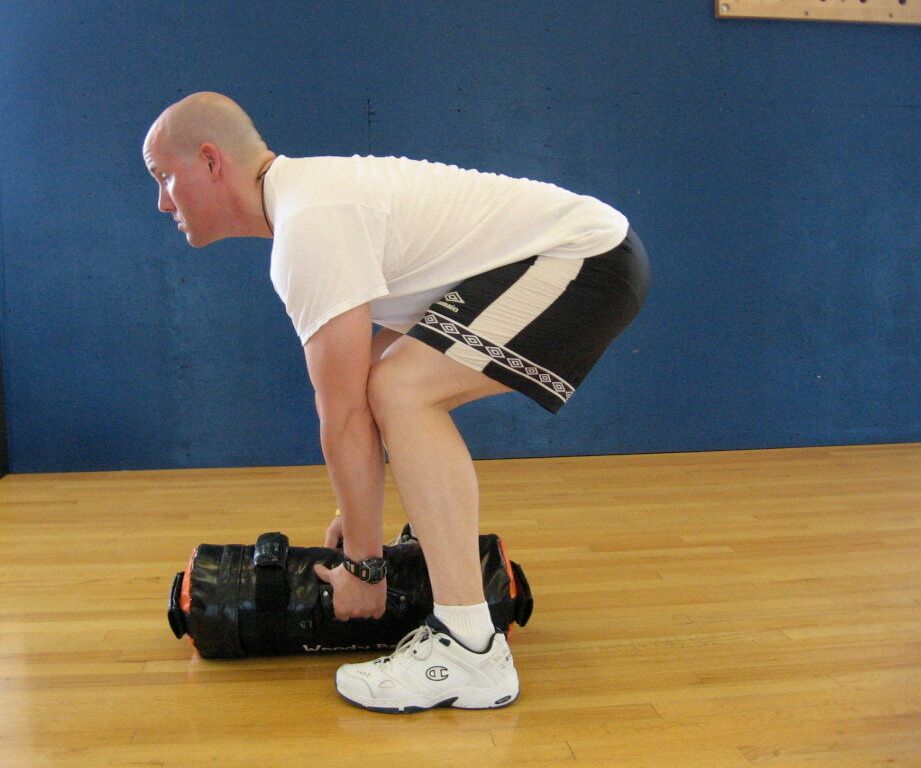
Zercher: Squats & Lunges
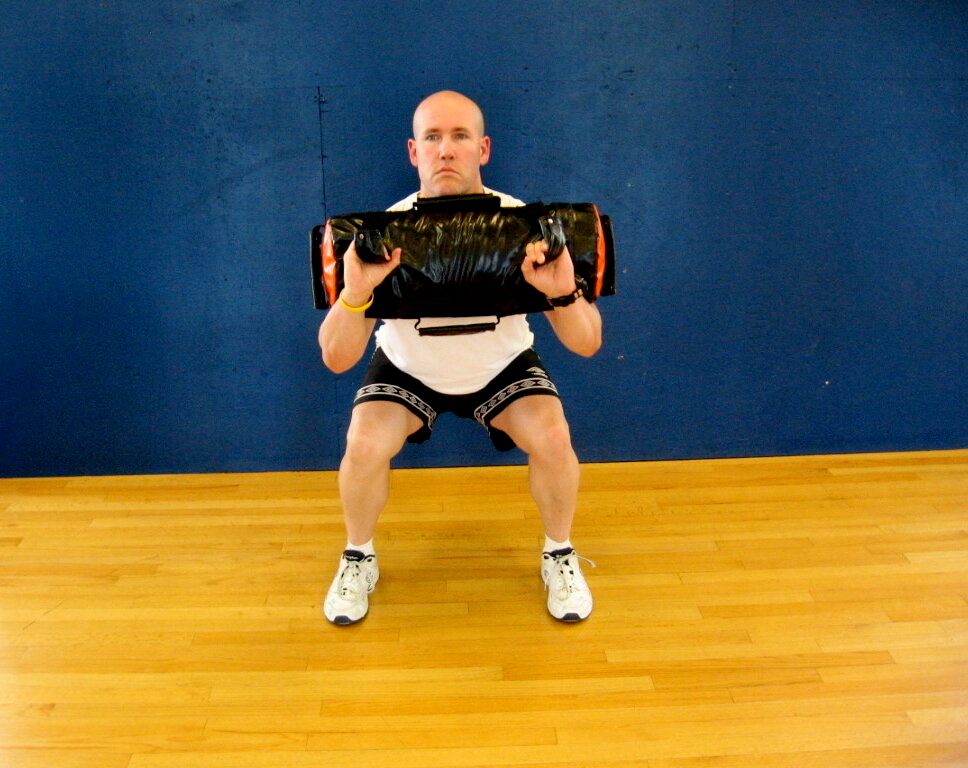
TAKU In modified Zercher Carry Position
The Zercher position is the secondary position of loading. The Zercher is a more challenging loading position because there is increased leverage working against the trunk and the upper back. It is vital when using the Zercher holding position, that the elbows remain as high as possible. When the arms begin to drop under heavier loads there is a natural tendency to have the upper and lower back begin to round. Holding the sandbag lower also decreases stress on the stabilizing muscles.
Shouldering:
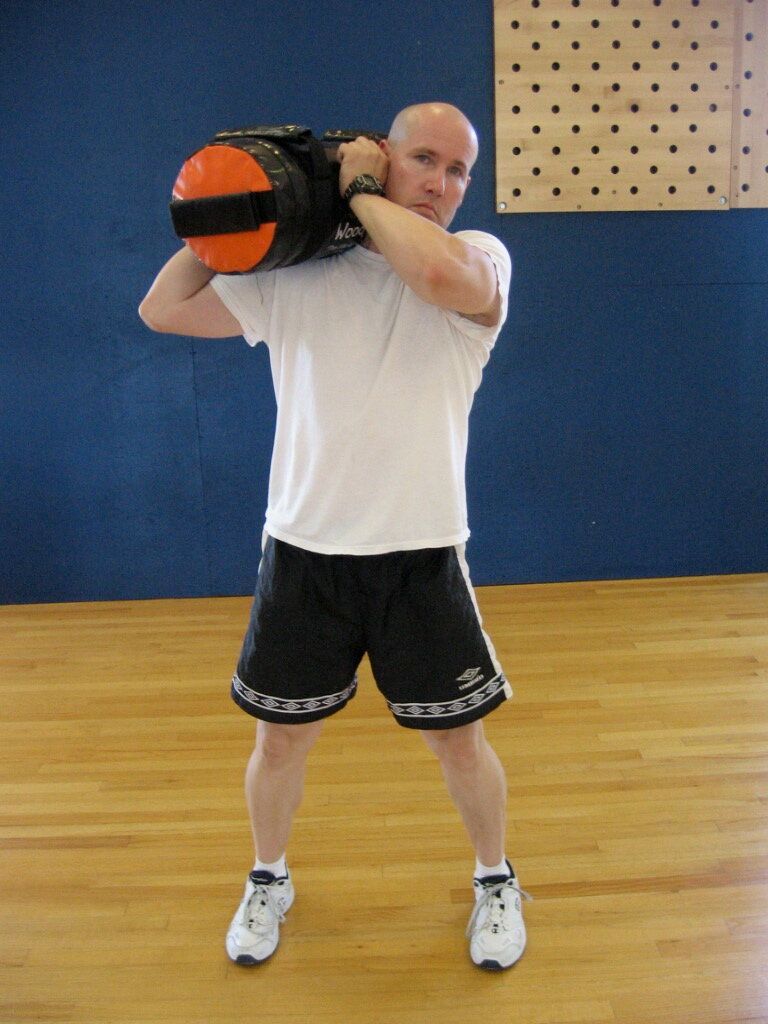
TAKU Shouldering a Sand-Bag
Shouldering may seem like an unusual holding position using most standard strength training tools. For sandbag training this is a position you should become familiar with. Holding the bag in this position places the whole body under an uneven load. This is one of the most powerful aspects of sandbag training and even though your body may be in a balanced position such as a squat, the uneven load makes the body unbalanced. This is far more challenging to maintain posture and balance during all movements, especially unilateral ones.
Overhead Lifting and Holding:
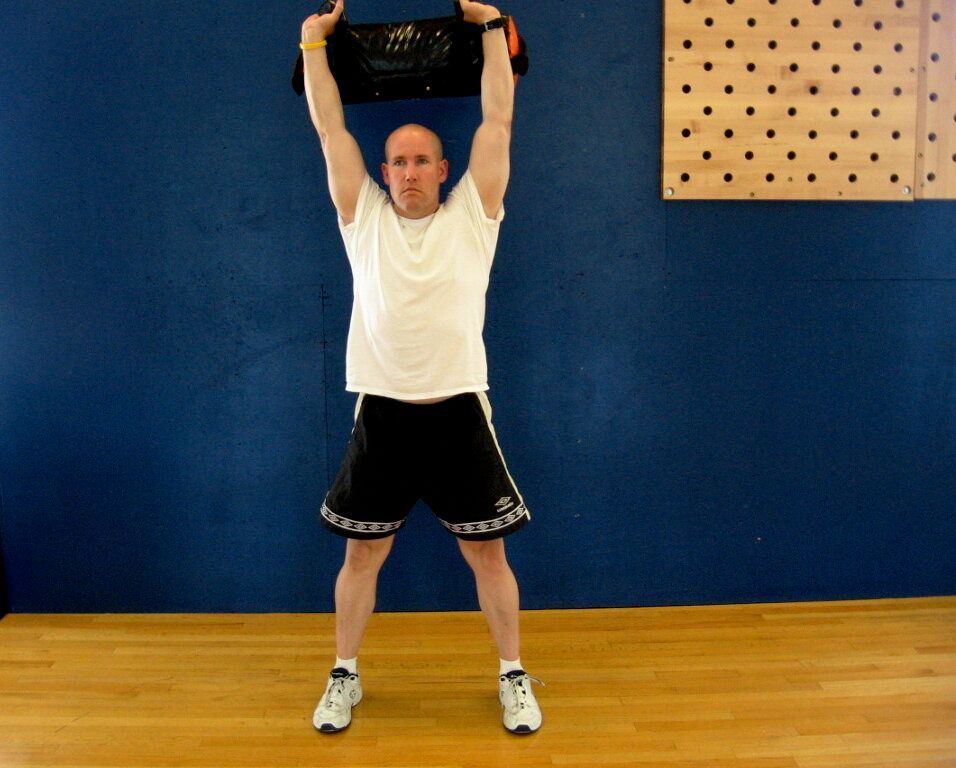
TAKU Sand-Bag Over Head Press
The overhead position is one of the most challenging, yet very familiar to most lifters. Having the sandbag overhead places the greatest amount of leverage on the entire body, especially the trunk. The sandbag being overhead is an unstable object that will shift as you perform various movements. This makes the entire body unstable, so I suggest you start light. Strive to perfect these movement patterns while you maintain balance and stability.
TAKU’s NOTE: One of the best resources out there for sandbag training is my longtime friend and strength and conditioning coach Ross Enamait . Ross has put together a great DVD package on sandbag training. This DVD will not only teach you how to implement a sandbag training program for any athletic or aesthetic goal, it will teach you how to build your own sandbags from the ground up. For those who may not feel like building their own sandbag, I recommend you visit our old friends at Iron Woody and check out their selection of Sand Bells. If you are on a budget, but not feeling in a D.I.Y. mood, you can check out GET OUT sandbags for a reasonable priced option. Finally, if you are looking for the best of the best, check out BRUTE FORCE SANDBAGS .
TNT has over 35 years of combined fitness experience, so if you’re looking for a coach who can train you online from anywhere in the world, visit our online training page to book a consultation.
Recent Articles